Setting Up Dev Containers on Windows 11
First, install the necessary applications.
Install Docker Desktop: Docker runs the engine for Dev Containers. You can download Docker Desktop from the official Docker website. Make sure to install a version compatible with your Windows.
Install Visual Studio Code (VSCode): If you’re reading this, chances are you already have it installed, right? 😉
Install the Remote – Containers extension in VSCode: This extension enables communication between VSCode and Docker. You can install it from the Extensions view in VSCode. And there you have it—you’re almost set.
Running Specific Sources in a Dev Container
With everything installed, let’s look at how to use Dev Containers.
Create or Import a Project: Create a new folder for your project or navigate to an existing one in VSCode.
Set Up a devcontainer.json File: Within your project, create a new folder named .devcontainer and inside it, a new file named devcontainer.json. This will define your container environment. Sometimes, this configuration file might already be included when cloning from GitHub. For AutoGPT, it’s there waiting for you! 📂
Build the Dev Container: Once your devcontainer.json is ready, open the command palette (hit F1), type “reopen in container,” and select ‘Dev Containers: Reopen in Container’ from the options list. VSCode will start building a Docker container based on the configurations in the devcontainer.json file.
Install Necessary Packages in the Terminal: From the terminal, install the required packages (pip install -r requirements.txt).
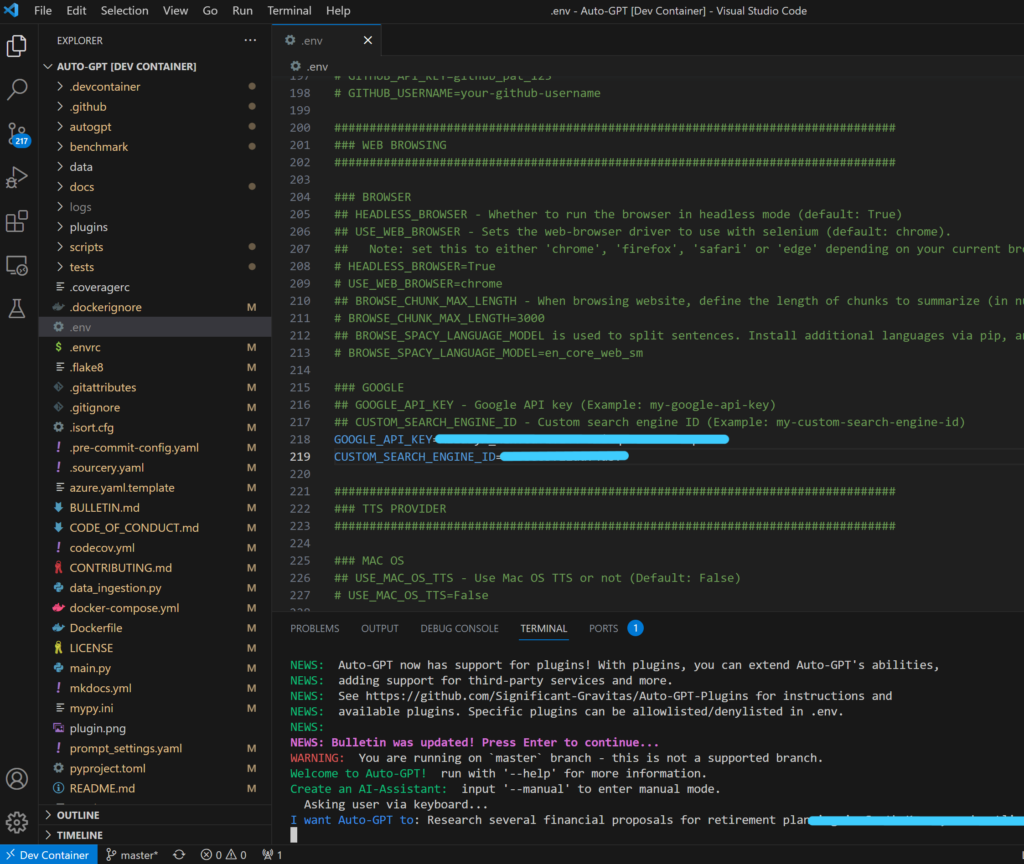
Start Coding: Once the container is ready, the VSCode window reloads in the container’s context. With all dependencies and settings from the devcontainer.json in place, you’re all set to code within this environment. If you’ve opened the AutoGPT source in the container, pop open the terminal and give it a run! 🚀
If you’re only a light user of development tools, this might not catch your interest. But leveraging VSCode’s plugins can make development smoother and safer. Sure, understanding the plugin mechanisms can be a bit tedious, but the container workflow I’ve described is foundational to DevOps. Familiarizing yourself with it can be incredibly useful. I hope this post aids in running a more streamlined collaborative development environment. 🤝
Ever since chatGPT made its debut, a wave of AI models has followed suit. Among them, AutoGPT, unleashed by a user called “Significant-Gravitas” on GitHub on March 30, 2023, is currently all the rage! 🌟
AutoGPT is an open-source Python program powered by OpenAI’s GPT-4 language model. It’s a model that autonomously runs by generating intermediate tasks with multiple agents until the final result is achieved. Some agents split tasks, others execute them, and some even evaluate the work done by others. Watching it identify and complete sub-tasks through logical reasoning is mind-blowing! 😲
For those curious enough, you might have already grabbed the source from GitHub and tried it out. However, if you’re facing issues with your current Python version or other environment quirks, worry not! While seasoned users might set up extra modules in a Python virtual environment, the AutoGPT source comes with Dev Container configuration files, allowing you to run it in a more perfect setting. So, what exactly is a Dev Container?
Visual Studio Code (VSCode) boasts a powerful feature for using Dev Containers. With Dev Containers, you can set up and use an environment suited for each project. This means you can focus solely on coding without the hassle of configuring your environment. The perks? Consistency, reproducibility, and easy sharing. Collaborating with others will be like stepping into a whole new world! 🌍 So, how about a quick rundown on using Dev Containers in a Windows setting?
Setting Up Dev Containers on Windows 11
First, install the necessary applications.
Install Docker Desktop: Docker runs the engine for Dev Containers. You can download Docker Desktop from the official Docker website. Make sure to install a version compatible with your Windows.
Install Visual Studio Code (VSCode): If you’re reading this, chances are you already have it installed, right? 😉
Install the Remote – Containers extension in VSCode: This extension enables communication between VSCode and Docker. You can install it from the Extensions view in VSCode. And there you have it—you’re almost set.
Running Specific Sources in a Dev Container
With everything installed, let’s look at how to use Dev Containers.
Create or Import a Project: Create a new folder for your project or navigate to an existing one in VSCode.
Set Up a devcontainer.json File: Within your project, create a new folder named .devcontainer and inside it, a new file named devcontainer.json. This will define your container environment. Sometimes, this configuration file might already be included when cloning from GitHub. For AutoGPT, it’s there waiting for you! 📂
Build the Dev Container: Once your devcontainer.json is ready, open the command palette (hit F1), type “reopen in container,” and select ‘Dev Containers: Reopen in Container’ from the options list. VSCode will start building a Docker container based on the configurations in the devcontainer.json file.
Install Necessary Packages in the Terminal: From the terminal, install the required packages (pip install -r requirements.txt).
Start Coding: Once the container is ready, the VSCode window reloads in the container’s context. With all dependencies and settings from the devcontainer.json in place, you’re all set to code within this environment. If you’ve opened the AutoGPT source in the container, pop open the terminal and give it a run! 🚀
If you’re only a light user of development tools, this might not catch your interest. But leveraging VSCode’s plugins can make development smoother and safer. Sure, understanding the plugin mechanisms can be a bit tedious, but the container workflow I’ve described is foundational to DevOps. Familiarizing yourself with it can be incredibly useful. I hope this post aids in running a more streamlined collaborative development environment. 🤝
Leave a Reply