Last year, I got a laptop and its storage was already feeling cramped. So, on a lazy day, I decided to upgrade the SSD. The thought of unofficially taking apart a finished product got my heart racing. Most people would probably think, ‘How do you even take this apart?’ But hey, I’ve done this dozens of times! 💪
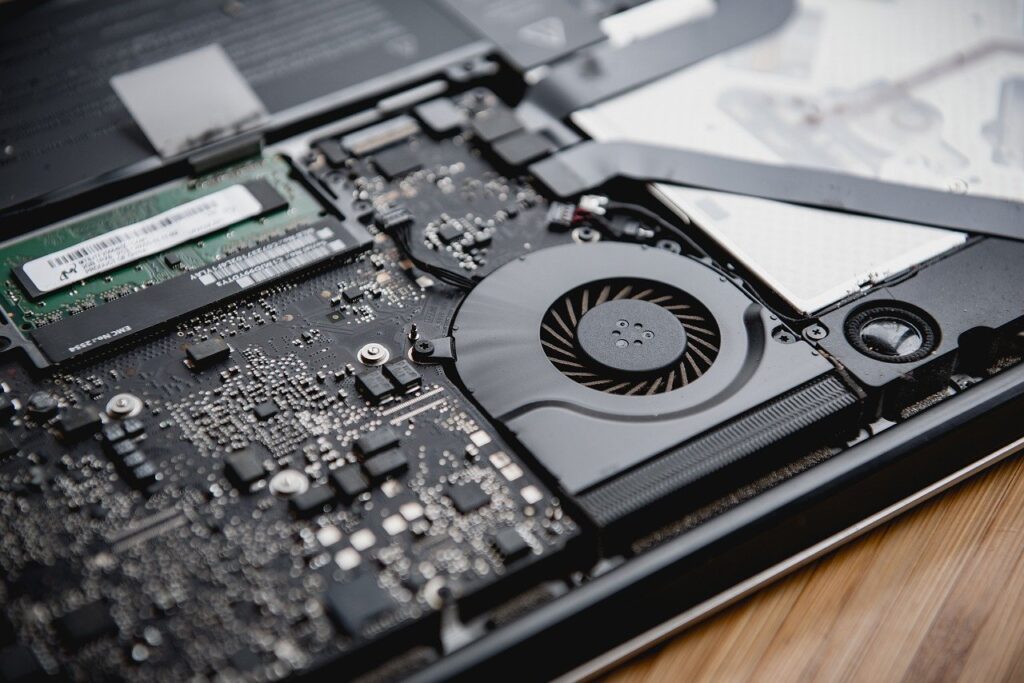
Looking at the bottom, there were no screws in sight. Yet, there was this suspicious anti-slip rubber pad that seemed like it was part of the manufacturing. Lifting it with a cutter, I could see the screw holes peeking from underneath. Too obvious, right? After twisting the screws out, I mercilessly slid a guitar pick into the laptop’s side groove and twisted it with force. With a ‘snap’ sound, the laptop’s insides were revealed.
Playing guitar really pays off!
I murmured to myself. Who knew taking apart a laptop had anything to do with playing guitar? Doesn’t matter. I had to focus on the task. Between the gaps, I noticed a thin film connecting the top and bottom. Messing this up would mean a broken laptop. I bet some folks had that happen before. With tweezers, I carefully removed the film and lifted the top completely, feeling like the engineer who originally designed it.
Next, I detached the battery (never work with the battery connected, risk of a short circuit!) and swapped out the old SSD for a new one. Then, like a time traveler going in reverse, I reassembled everything. Reinstalled Windows and checked if everything worked. Seeing that Windows logo pop up was electrifying. But after a while, I noticed a corner of the top and bottom wasn’t fully aligned. 😅
Initially, I wanted to ignore it, too lazy to dismantle again. But my eyes kept drifting there. Even while picking up seaweed with chopsticks during meals, I thought how it would fit perfectly in that gap. I couldn’t get it out of my head. So, I ditched my meal and started taking the laptop apart again. 😤
The culprit? The plastic part on the bottom holding the nut in place had broken. That’s why that corner wouldn’t stay put. I had to fix the nut back to the bottom. I sought advice from a senior about bonding plastic with metal.
‘Epoxy is the best for bonding plastic and metal. It’s made of two liquids that harden when mixed. No epoxy? How about super glue? It’s not as strong alone, but sprinkle some baking soda on it, and it becomes a game-changer. It acts as a hardener, setting quickly and solidly.’
Following the advice, I positioned the nut and got to work. Curious about the result? The screw sat firmly on the plastic like a rhino’s horn. Hallelujah! I almost wanted to call baking soda ‘bonding soda’. Then, I reconnected the film. But suddenly, the plastic piece meant to hold the film to the board came off. Never encountered this before. 😰 Sweating, I tried to attach a tiny plastic piece, smaller than a clipped fingernail. It was the toughest challenge of my life. I tried inserting the film into the holder dozens of times, to no avail. An hour passed, and I noticed the metal contacts on the film were frayed. I knew then, this was it.
The song ‘Two Goodbyes’ by Yoon Jong-shin and Lee Jeong came to mind. Instead of clinging like Yoon Jong-shin, I wanted to let go like Lee Jeong. What was it? The laptop, of course. Quietly, I joined the top and bottom, screwing in seven screws like a heritage restoration expert. At least it looked pristine, even if the last screw couldn’t be tightened, thanks to the misplaced nut.
Instead of strumming guitars, maybe I should’ve gone to engineering school instead of studying math…
I was left with that regret.
Leave a Reply